Excel to video - Full tutorial


Summarize with


Did you know you could convert data from Excel to video, or rather, multiple videos? To actually make it happen, all you need is one Microsoft Excel spreadsheet, a single Adobe After Effects template, and a video automation software like Plainly Videos.
In this tutorial, we’ll show you the exact Excel to video workflow we use ourselves to create videos at scale. You’ll learn how to prepare a reusable After Effects template, connect Excel data to it, render multiple video versions automatically using none other than Plainly, and deliver the final videos straight to Google Drive. All this with no coding, no manual exports, and no repetitive editing.
Prefer watching? We've also prepared a short video that walks you through the entire process!
What is Excel to video?
Excel to video is a method of using spreadsheet data to control and generate video content automatically. Instead of hard-coding information into a video, values stored in a Microsoft Excel sheet, such as headlines, prices, images, colors, etc., are used as inputs that define how each video version should look.
How to create videos from Excel data
Creating videos from Excel works best when you separate design from data. The video structure lives in a reusable template, while Excel controls what changes between versions. This approach keeps your workflow flexible, fast, and scalable.
Now, we’ll show how to implement an Excel to video workflow using Adobe After Effects as the video editor and Plainly Videos to automate the process. After Effects gives you full creative control over animations and layouts, while Plainly connects your Excel data to the project and handles bulk rendering and delivery.
The process is similar to the one we talked about in our blog that explains how to create videos with Airtable. Nonetheless, we’ll break it down step by step - from preparing your video template to rendering and delivering videos automatically.
1. Create your video template in Adobe After Effects
Before you go ahead and convert your spreadsheet to video, you need to create a template. The template is what defines the structure of your video - layout, animations, transitions, and timing - while leaving specific elements open to change based on data.
We recommend you build your template in After Effects, as it gives you full control over motion design and is widely used for creating data-driven videos.
Design your template as you normally would, and once done, decide which elements should change dynamically. These usually include:
- Text layers (names, titles, prices, etc.)
- Images
- Colors
- Video
- Audio
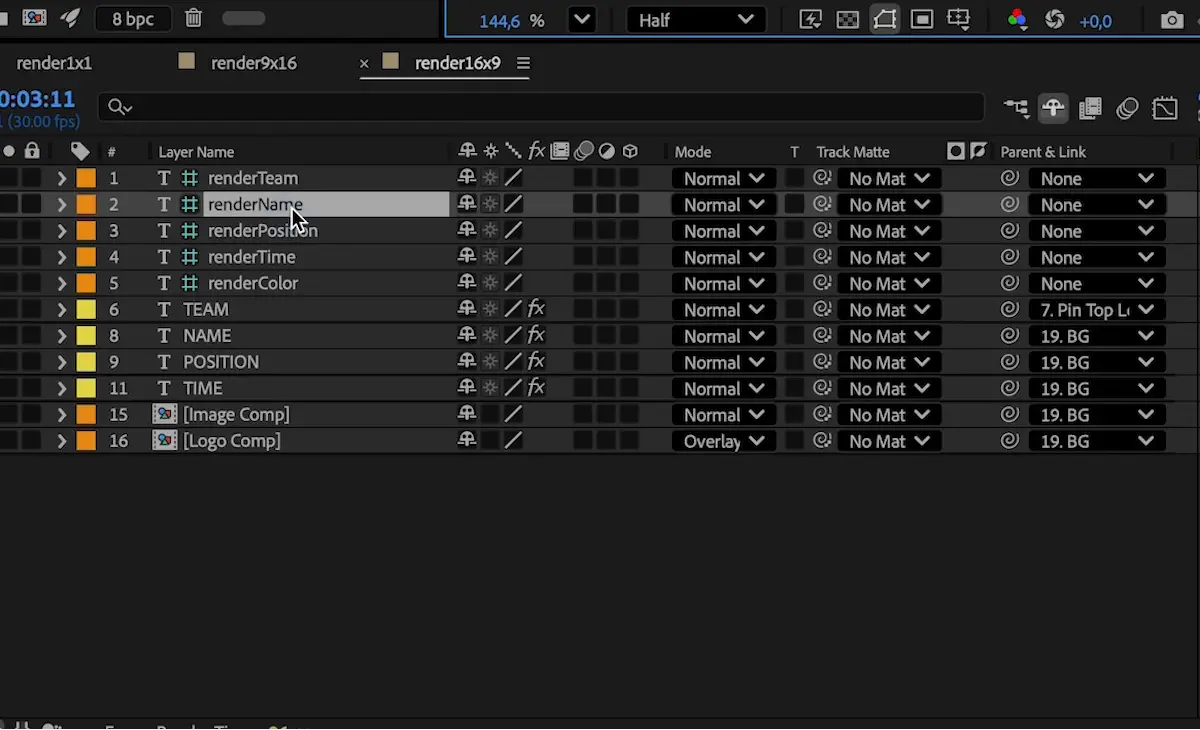
To mark these elements as dynamic, add a consistent prefix to the layer names. For example, if you use the prefix ‘’render’’, a text layer named renderTitle can later be replaced with values from your Excel sheet. The prefix is simply a signal that tells the video automation software (in this case, Plainly) which parts of the template are meant to change later.
Before moving on, make sure:
- All dynamic layers use the same prefix
- The layout is responsive to different text lengths or image sizes
- The project is clean and organized
When everything is ready, save and package the project so it can be used in the next step.
2. Upload your template to Plainly
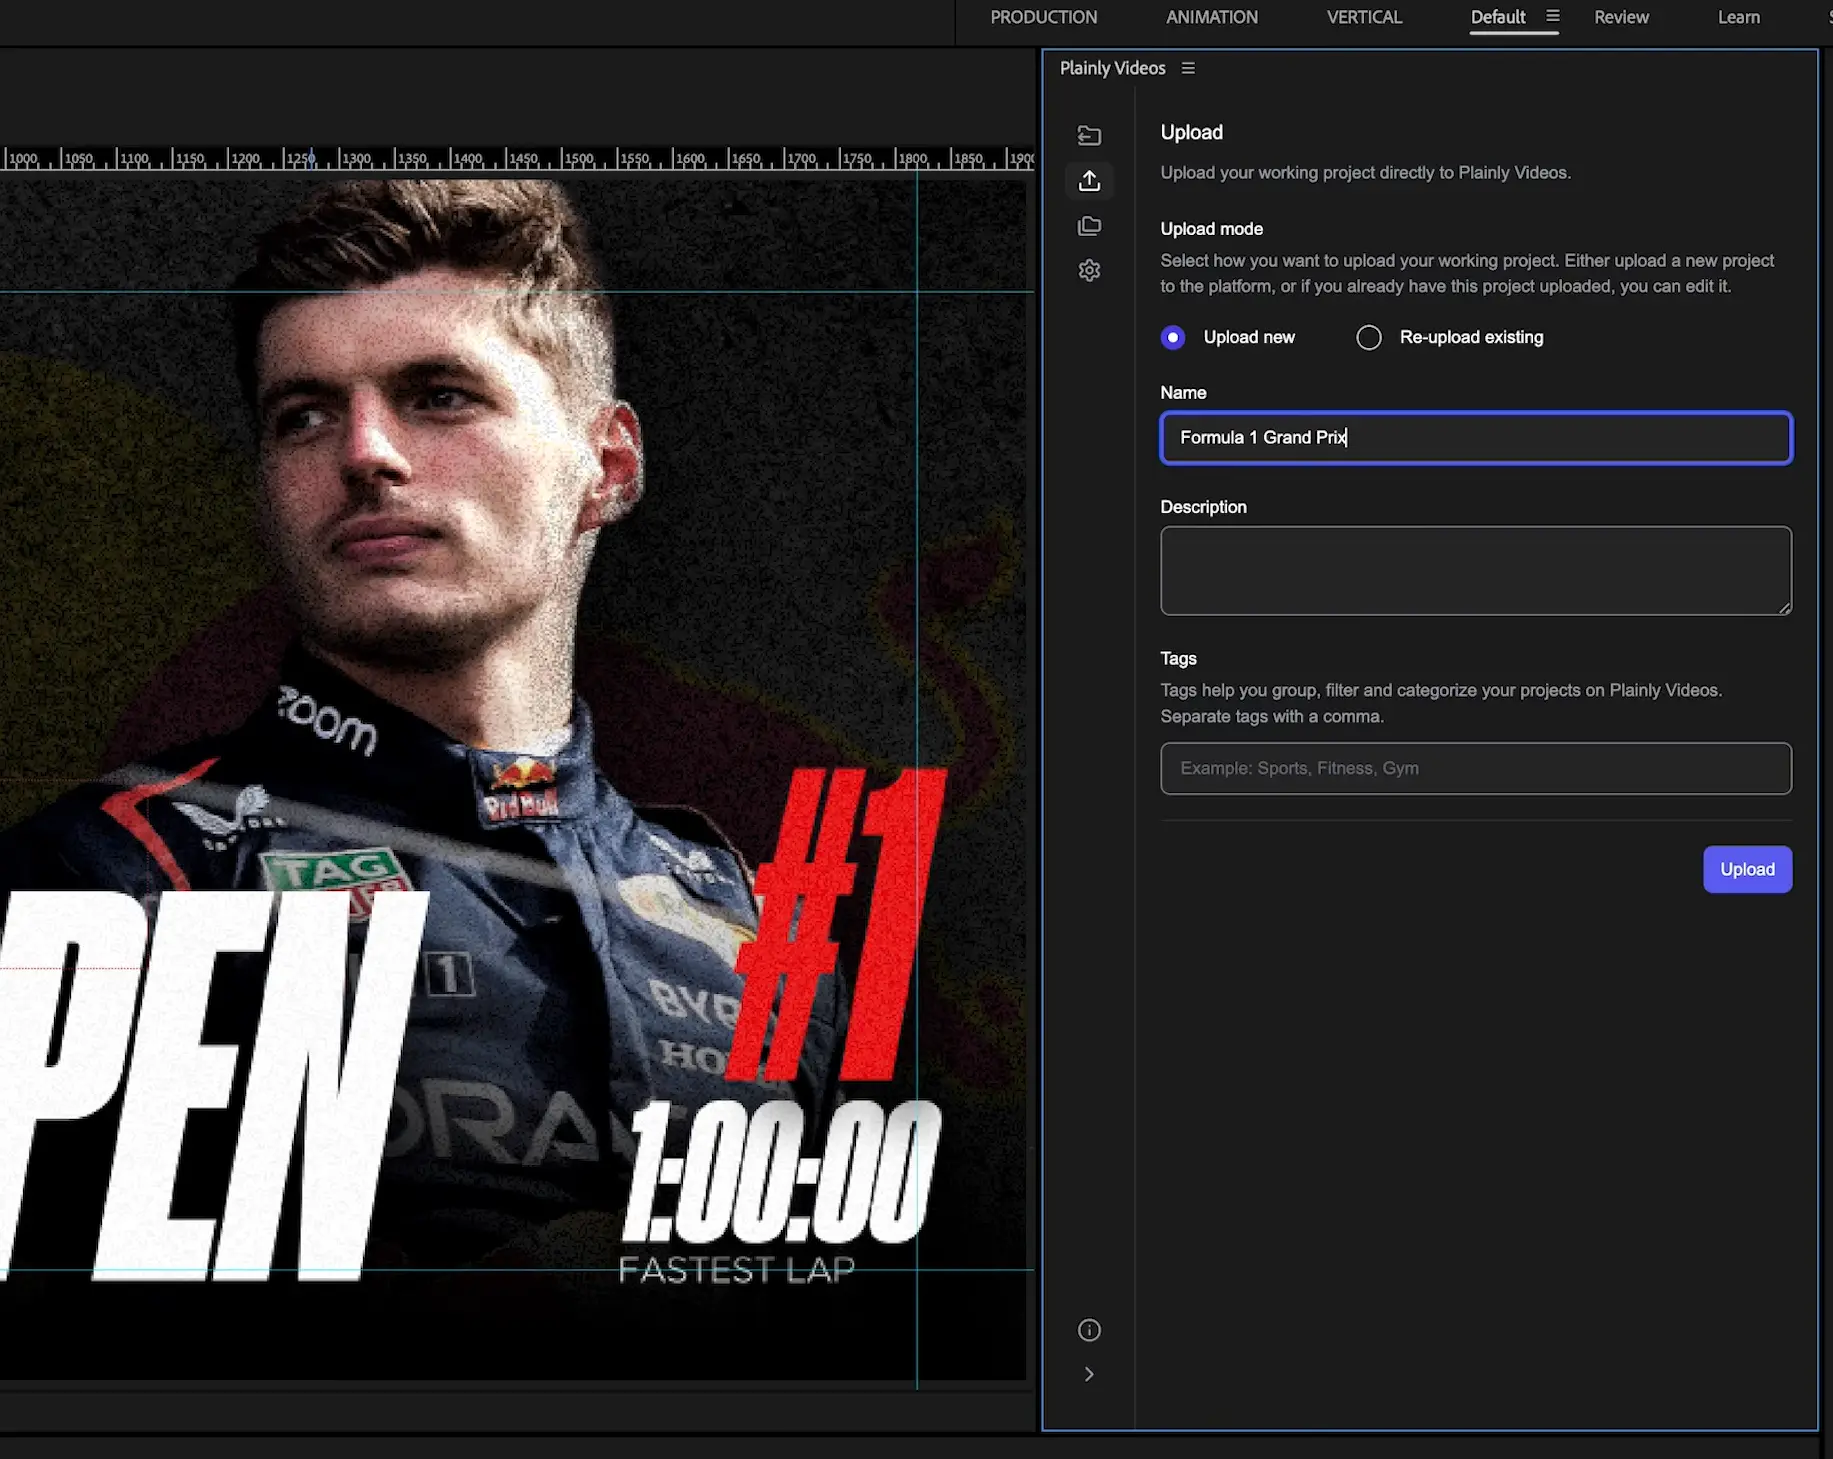
Template and assets all zipped up? Then, upload the zipped project from your Plainly dashboard and give it a name. Once the upload is complete, you can create templates directly from that project.

You can also use our native After Effects plugin to upload the project directly from AE.
Because you added a prefix to your dynamic layers earlier, the setup here is fast.
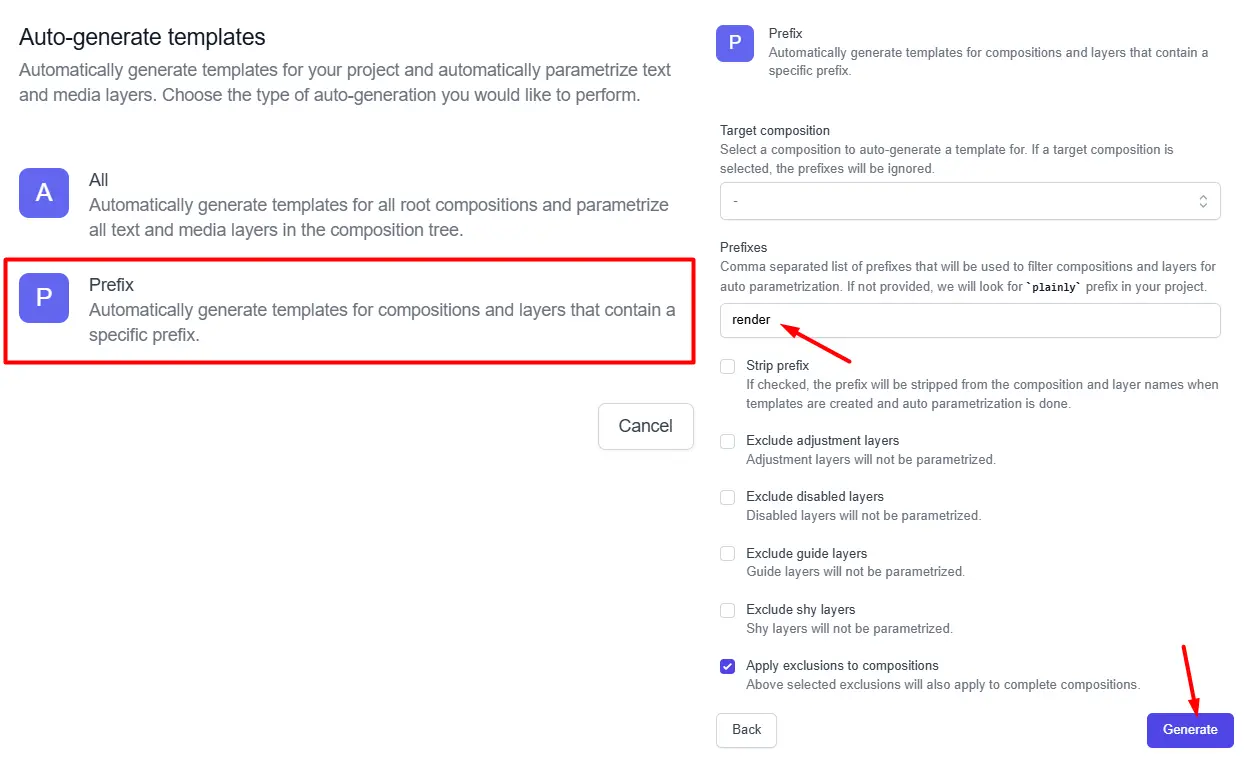
Scroll to the template section and choose auto-generate…
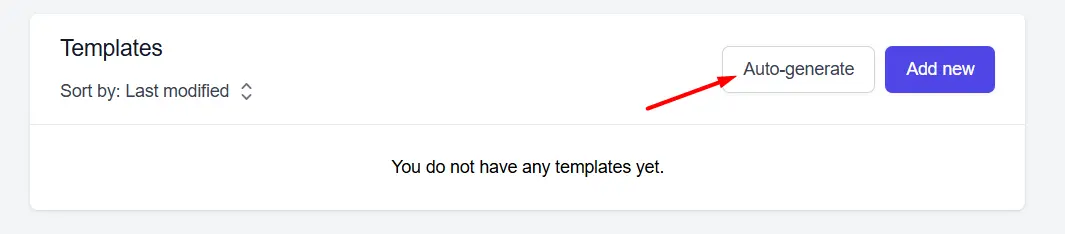
Then, select the prefix option, enter the prefix you used (for example, render), check or leave the additional settings unchecked based on your preferences, and finally, hit generate.
Plainly will then scan the project, find all matching layers and compositions, and mark them as dynamic automatically.
From our experience, this prefix-based setup covers most use cases. If you need more control, you can still adjust parameters manually, but for most Excel to video workflows, auto-generation is enough to move on.
3. Create your Excel spreadsheet
Next up, it’s time to create a new spreadsheet in Microsoft Excel.
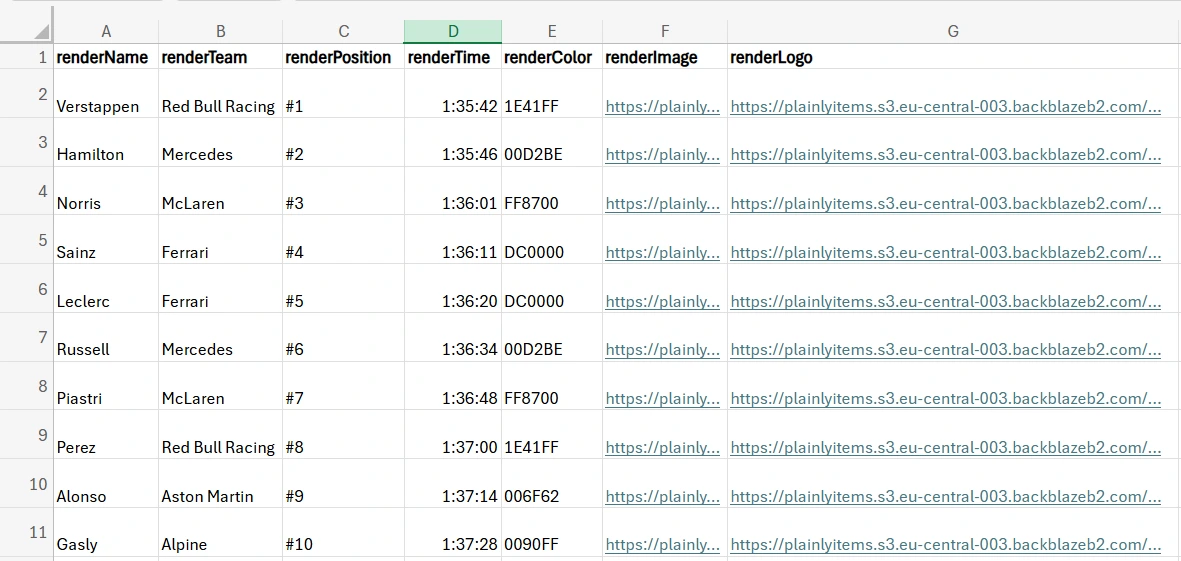
The first row in a sheet is reserved for column headers, which must match the names of the dynamic layers you set up in your AE template. Say you created a text layer called renderName. In that case, your Excel sheet should include a column with the same name.
Below the header row, add your data. Every row you fill out becomes a new video version. This can include things like:
- Text values (names, titles, prices, stats)
- Color values
- Image URLs
- Video or audio file URLs
Avoid empty columns, double-check naming consistency, and make sure URLs point to publicly accessible files if you’re using media assets.
4. Connect your Excel document to your template
To actually drive video creation, you need to connect your template with the Excel sheet you just created.
To do so, open your Plainly Videos dashboard, go to the Integrations tab, and select your project.
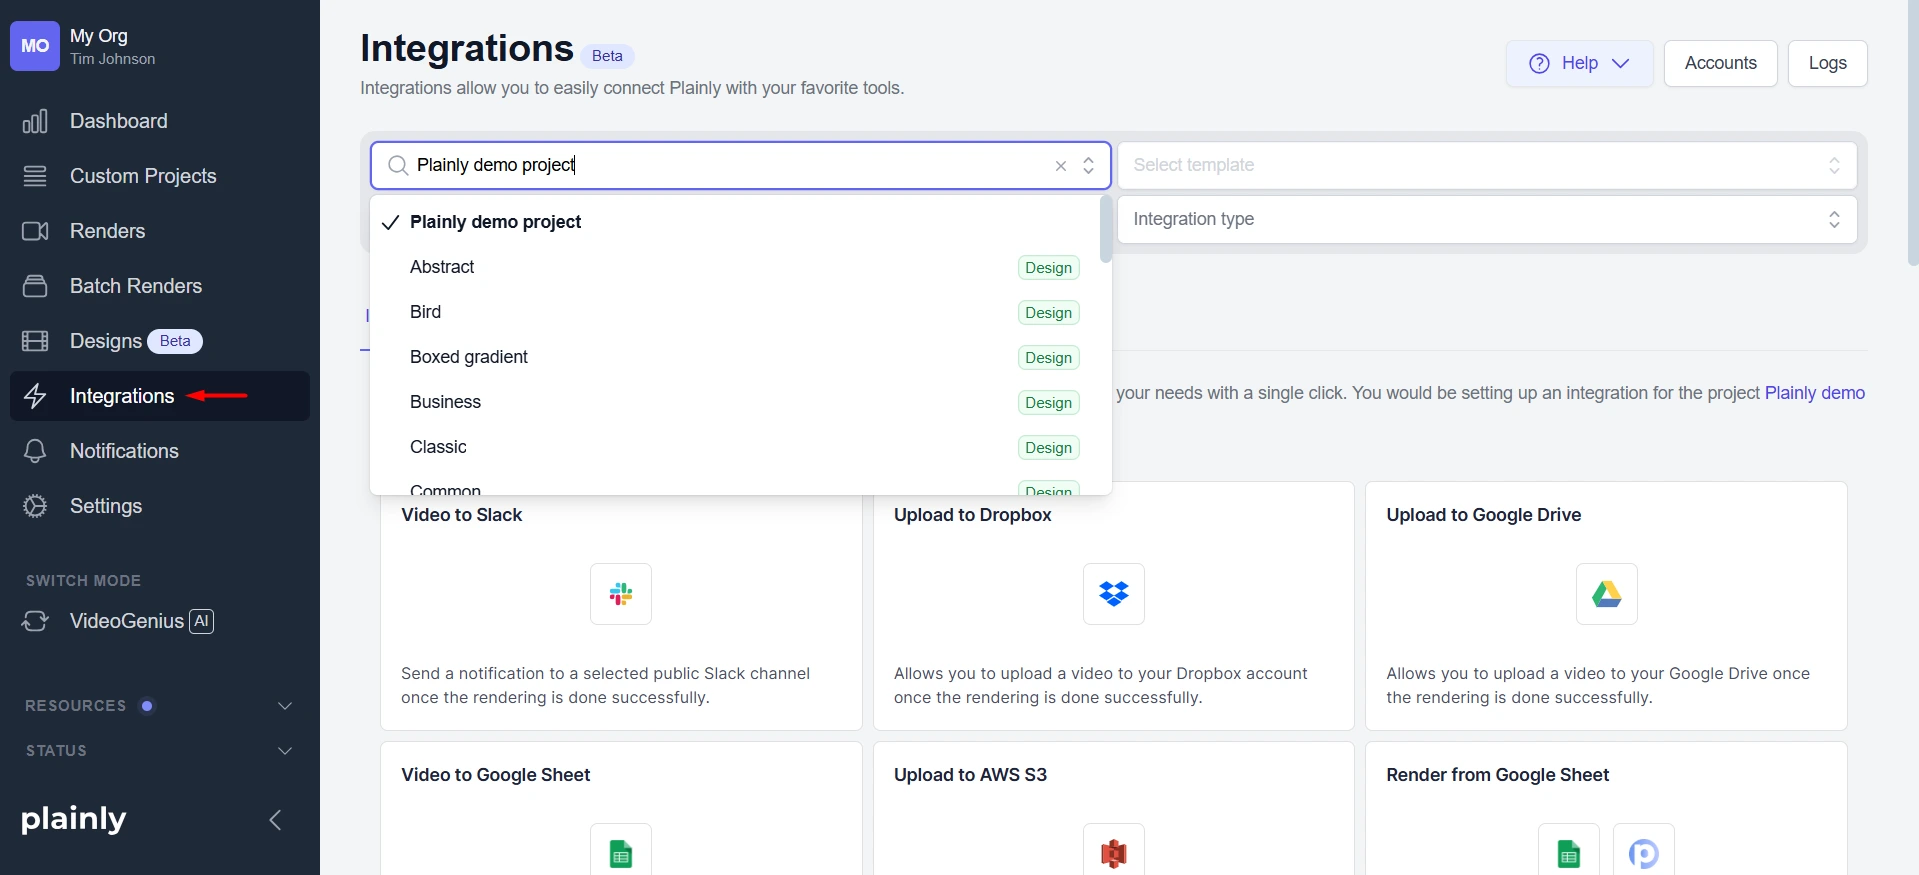
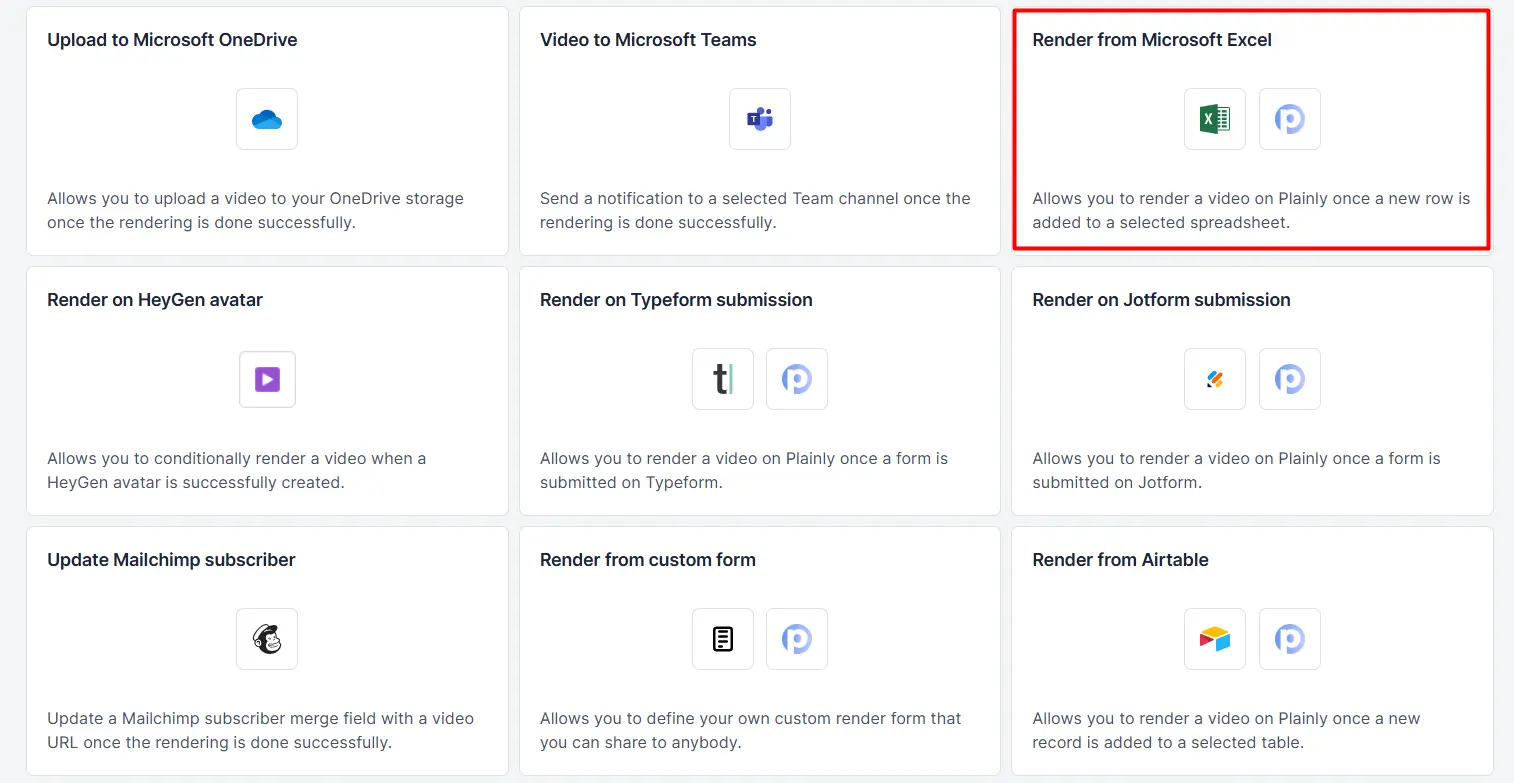
Then, choose the option to render videos from Microsoft Excel. This tells Plainly where the data is coming from and which template it should be applied to.
Next, connect your Excel file and select the spreadsheet and worksheet you want to use.
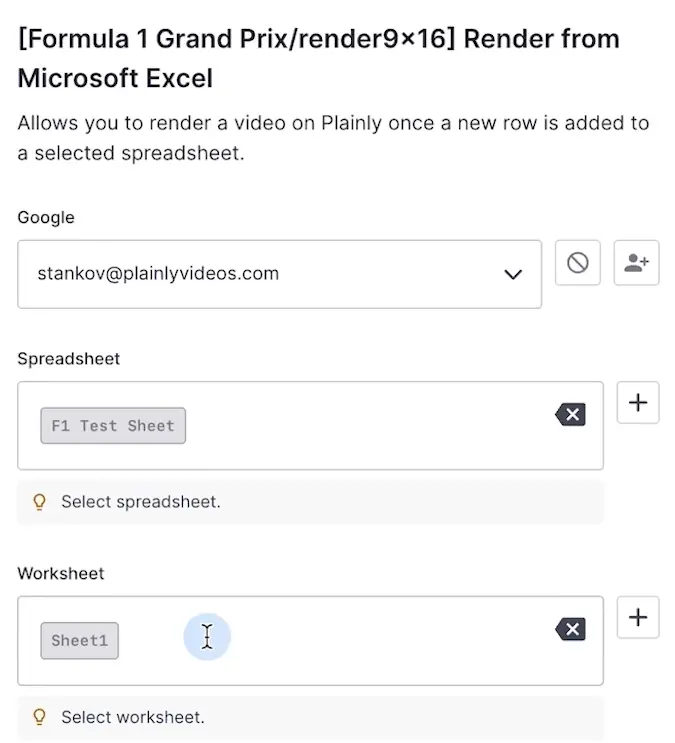
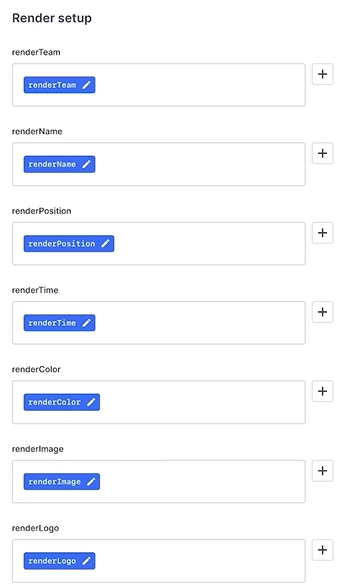
Plainly will then ask you to map the columns from your spreadsheet to the dynamic layers in your template. This is where each column header is matched to its corresponding dynamic parameter, such as text, color, image, or video layers.
If you’re working with multiple templates, say, different aspect ratios, you can select all of them at once to have Plainly render every selected format from the same Excel data in a single workflow.
At this stage, you can also adjust optional output settings, such as thumbnail generation or encoding preferences. For most Excel to video setups, though, the default settings work just fine.
When everything is mapped and configured, start the integration.
5. Render videos in bulk
From this point on, your Excel sheet is officially connected to your video template and ready to trigger renders.
The way it works is that each time a new row is added to your Excel sheet, a new render is triggered. Plainly pulls data from the sheet, applies it to your AE template, and renders in the background.
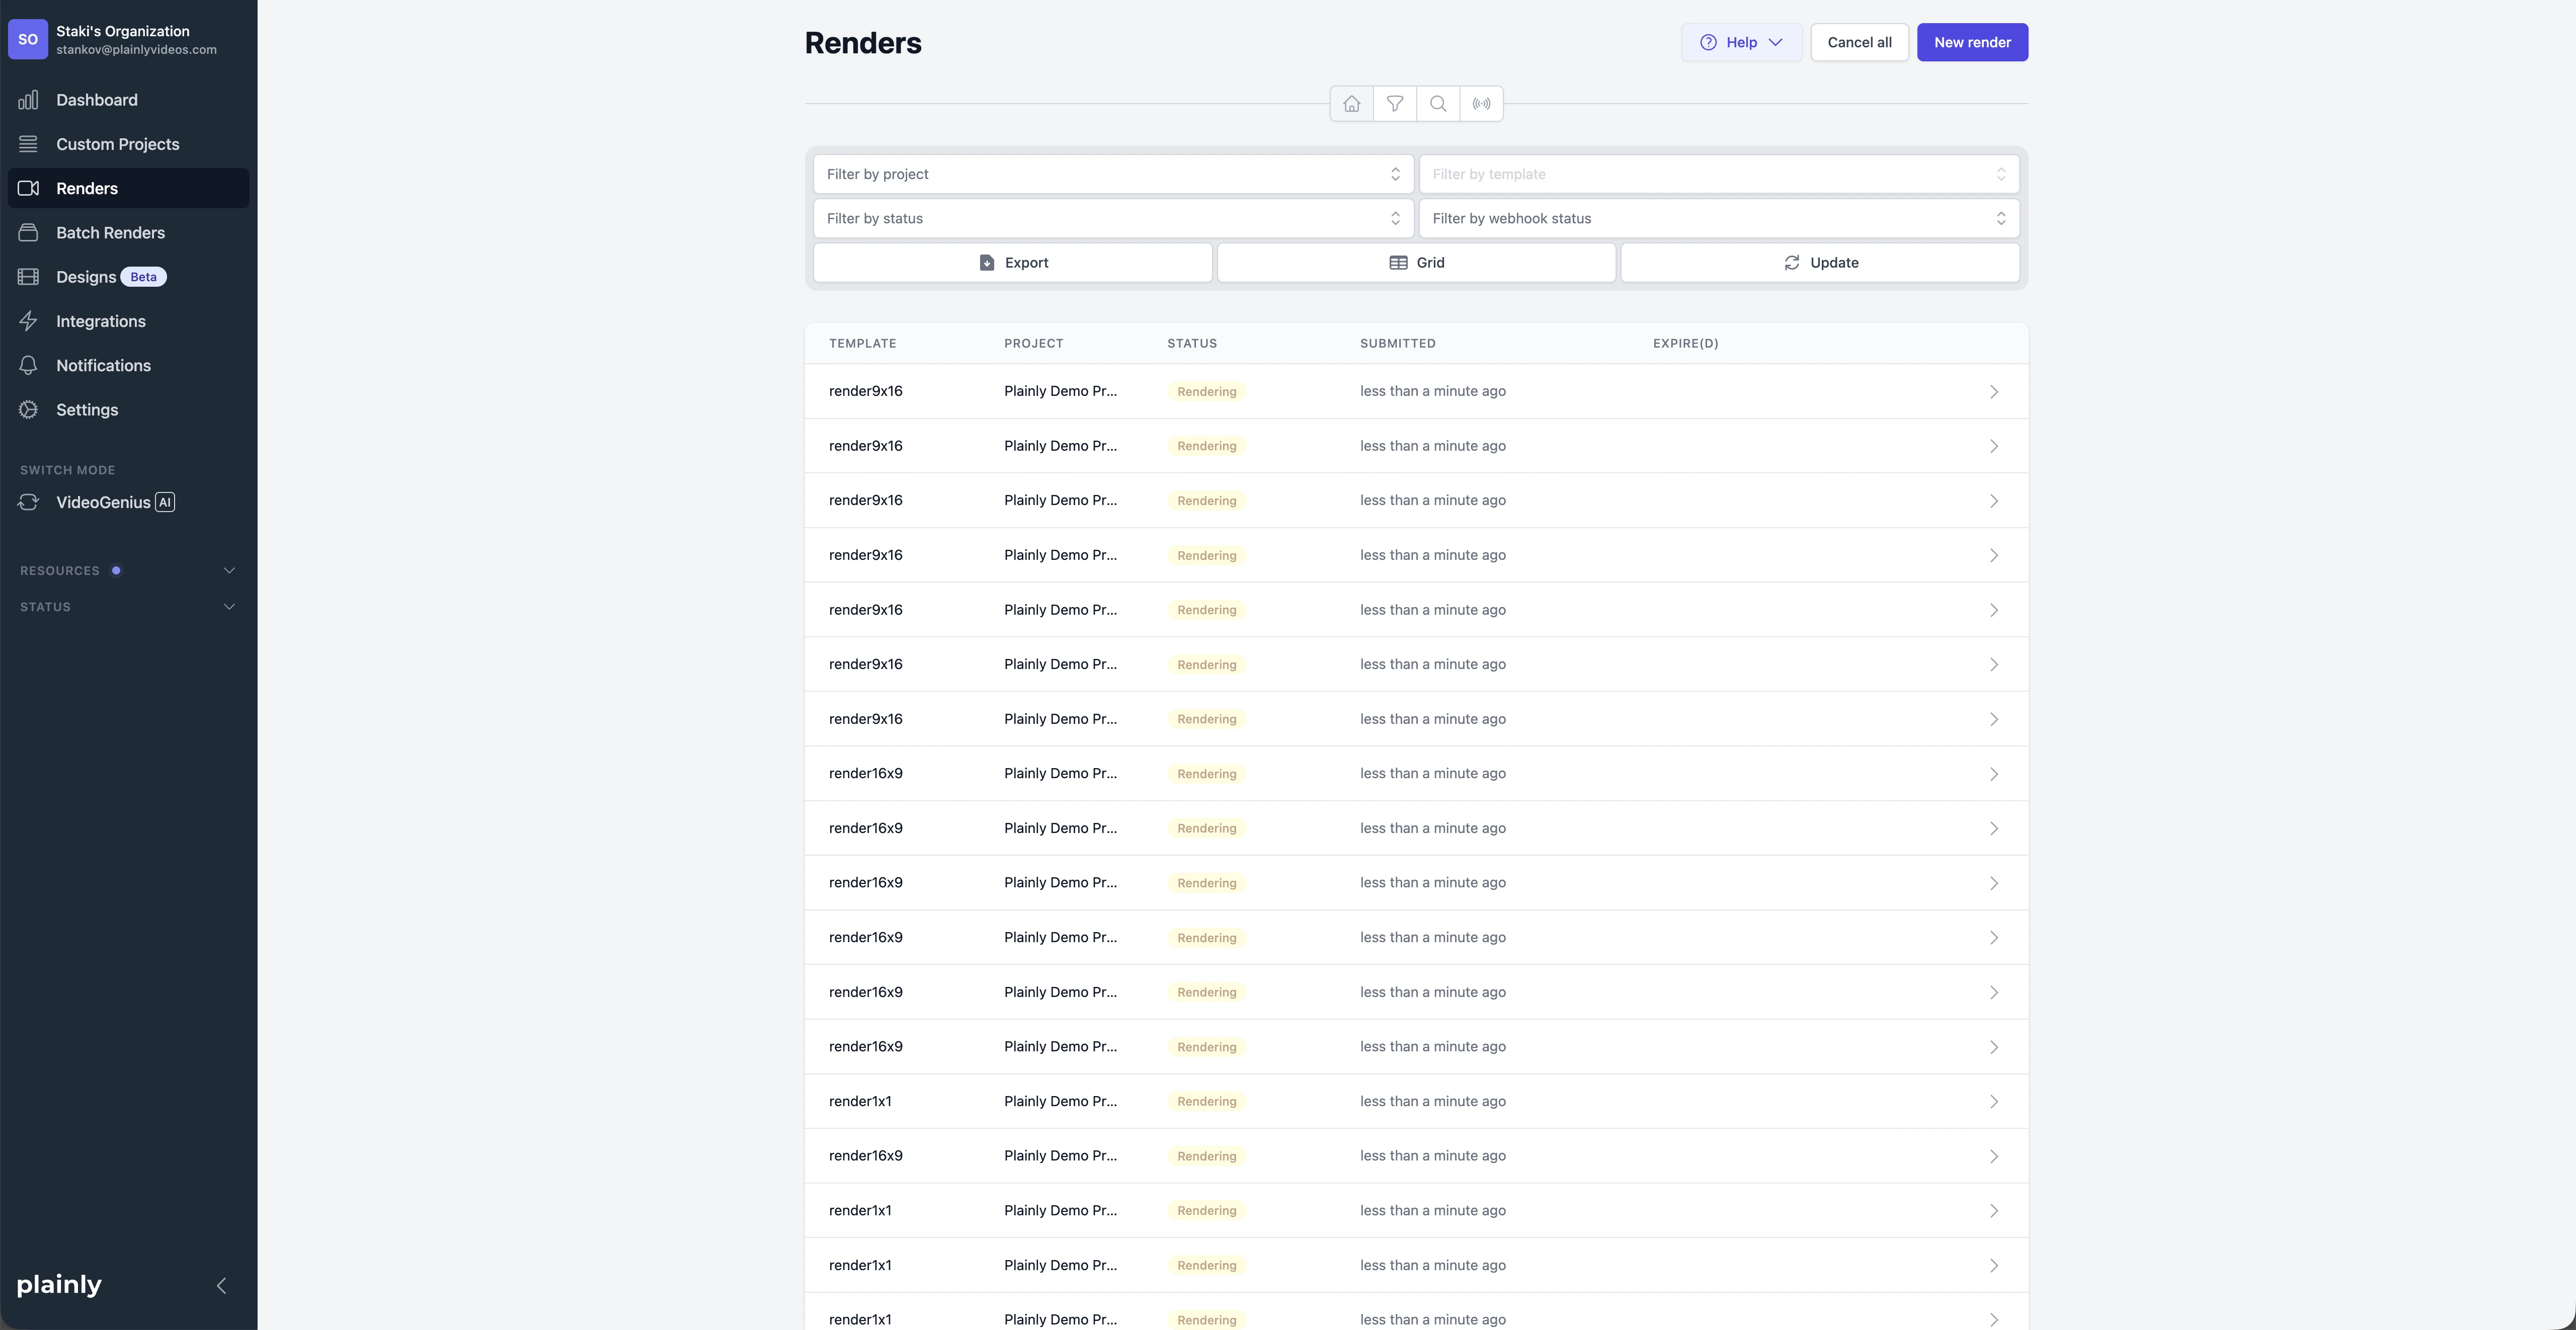
The logic is simple:
- One row equals one video
- Ten rows equal ten videos
- Hundreds of rows render hundreds of videos in one go
You can go about adding text to rows gradually or paste large batches of data at once; it doesn’t matter. This bulk video editor processes them all, generates the video versions, and keeps everything in sync with your spreadsheet. There’s no need to reopen After Effects or monitor the render queue. The whole process is automatic and allows you to scale your video production to infinity and beyond!
6. Download or automate the delivery of your videos
Once rendered, you can download and distribute your dynamic videos.
If you’d like to keep things manual, you can download the versions one by one straight from the tool. We recommend doing this only if you’ve got a handful of videos.
With more versions at play, a better approach is to automate the delivery. Plainly makes it easy to do so, given that it integrates with 20+ tools, including Google Drive, Dropbox, YouTube, Frame.io, and more.
If you need more flexibility, the software also features full API access. This allows you to plug video rendering and delivery into your own systems or build custom Excel to video workflows.
Create videos with Excel and Planly
And there you have it - a complete guide to the Excel to video automation process! You start with a single After Effects template, input the data into a Microsoft Excel sheet, and let Plainly handle the rendering.
This workflow is built for teams that want speed and consistency without manual editing. Once everything is connected, creating new videos is as simple as adding new rows to a spreadsheet. There are no timelines to manage, no exports to babysit, and no extra effort when you need to create 100s of versions!
If you want to try this Excel to video workflow yourself, you can start a 14-day free trial or book a demo with our team. Set it up once, fill in your data, and see how much time you can save when your spreadsheet, courtesy of Plainly, starts doing the editing for you.


.webp)